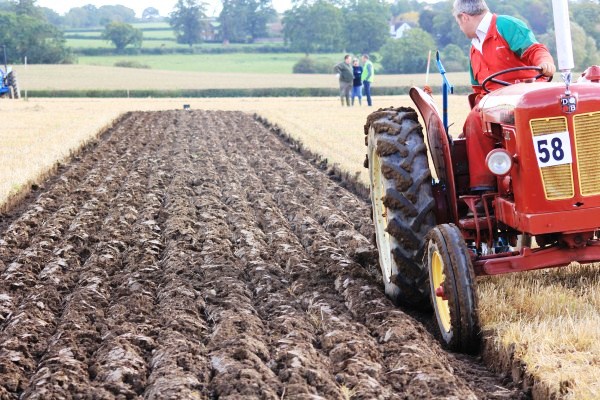
The plough settings page is designed to aid newcomers and novice ploughing competitors to set up their ploughs to a higher standard before entering the field and, once in the field, to understand what the judges will look for and to understand why judges look for particular faults during each element of the plot.
The following practice for checking alignment will work just as well for multi furrow reversibles as it does for the demonstration plough in the pictures.
This page will be built throughout the next 12 months or so and will start with plough alignment
Plough alignment.
In vintage and classic ploughing classes the equipment being used is now 37 years old as a minimum (classic ploughing) and some ploughs in the trailing plough class could be getting toward 90 years old.
Distortion, due to ploughing up boulder stones or tree roots is bound to be a problem, sometimes damage is clearly visible and a quick eye over the plough will show it is bent, however small amounts of distortion can only be detected by measurement, some very small amounts of distortion may have been evident in the plough from new, manufacturing processes have come a long way in the last 100 years and now most ploughs are perfect on leaving the factory, however years ago, the same may not have been the case;
follow the guide below to check if your plough is straight
Measure from point ( preferably new or equally worn set) to frame on each body to check pitch is the same on both, it is tolerable for the front body to be pitched down 1 cm more than the back one, but better both the same and certainly the rear furrow should not dig deeper than the front.
Click on images to enlarge
Click on images to enlarge
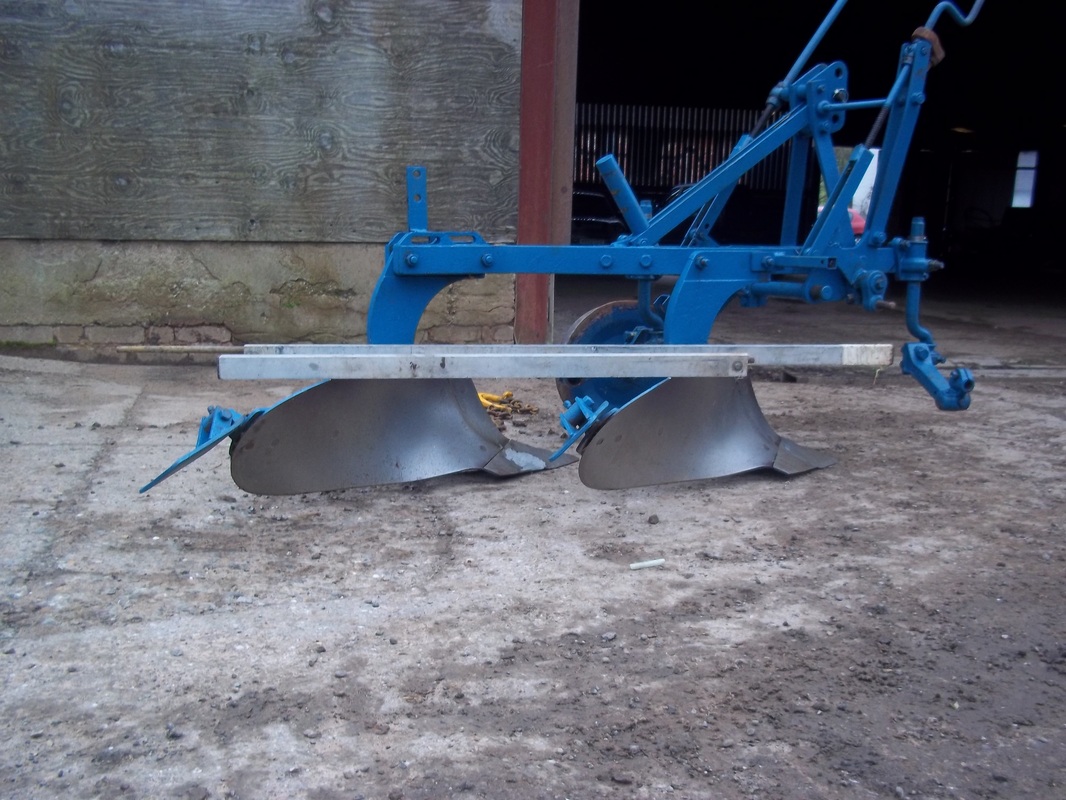
Using straight edges
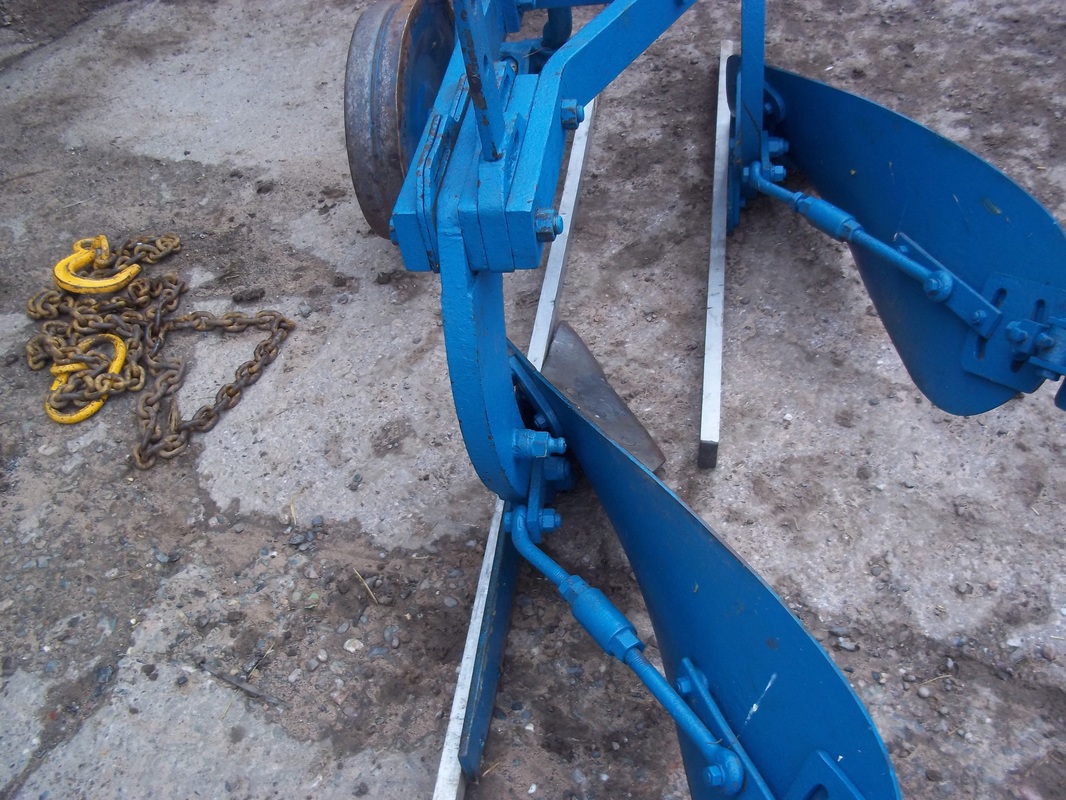
Remove points and clamp 2 straight edges to land sides, measure between at 2 points along the length of the straight edges to check for parallel
Furrow width

Whilst the straight edges are clamped in place check furrow width corresponds with frame settings, if plough is distorted your plough may not be ploughing the width that the frame is set at.
Setting boards to parallel
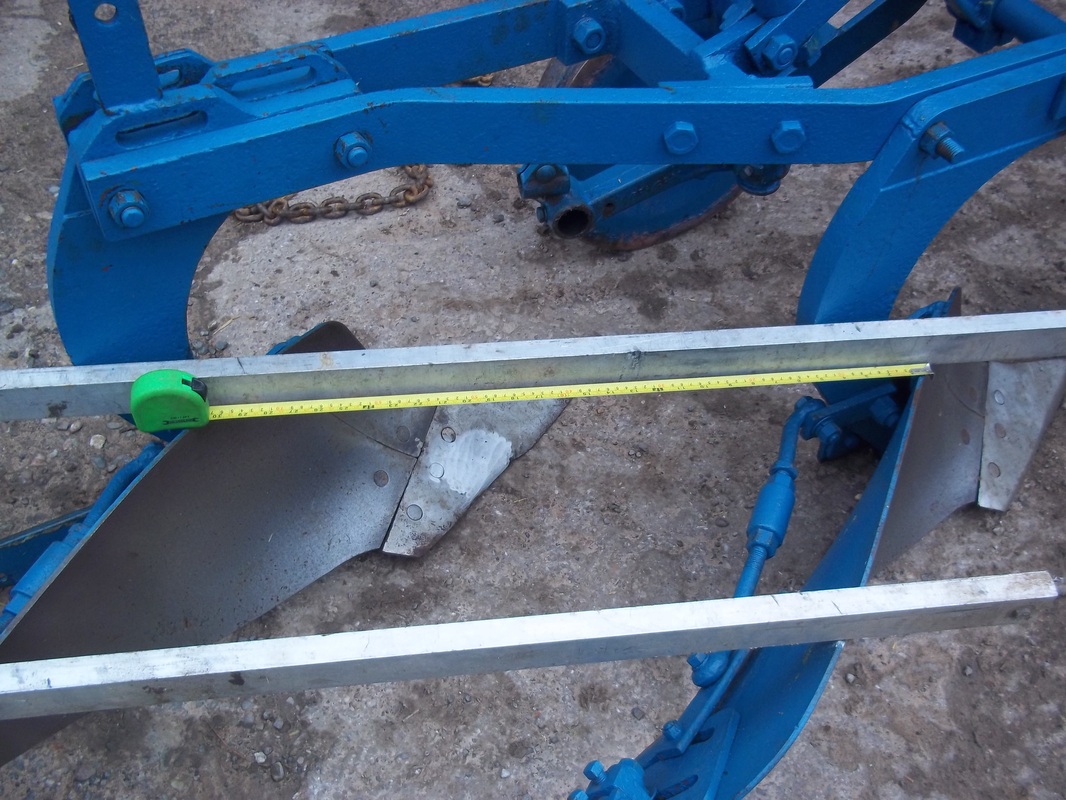
Measure from a known point ( front of shin, top corner of mould board, front corner of board or end of new point) up to top of mould board near the back end and mark with chalk, repeat on 2nd mould board.
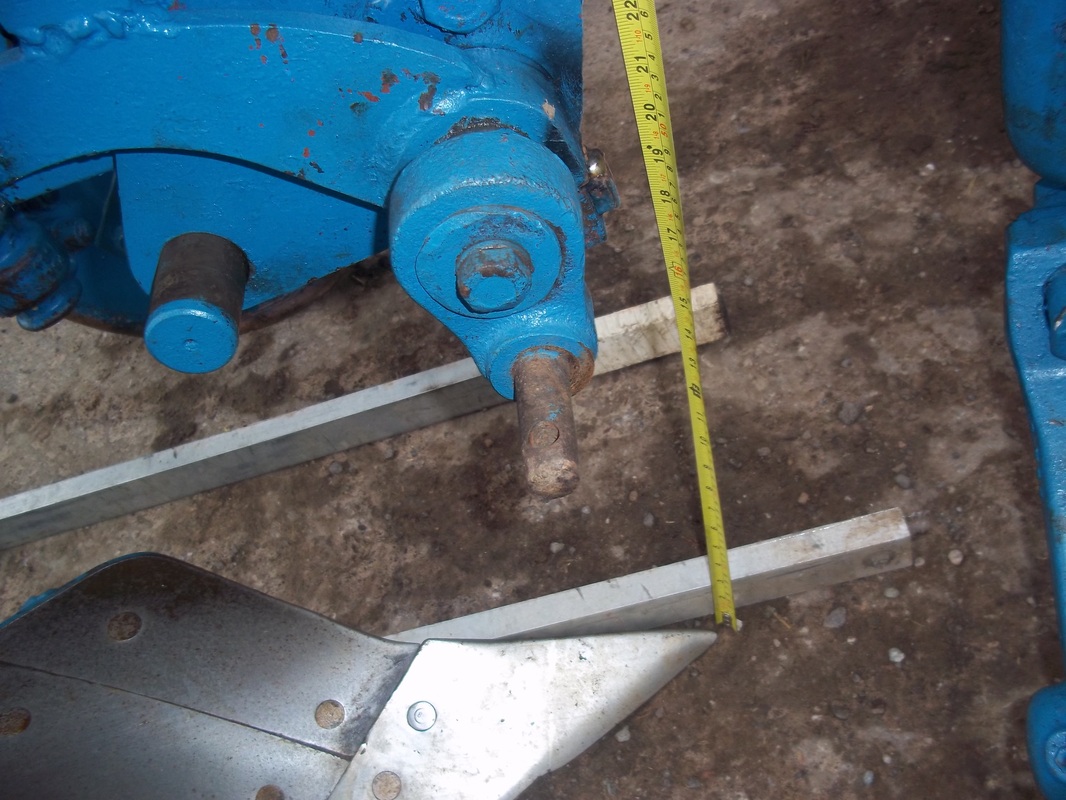
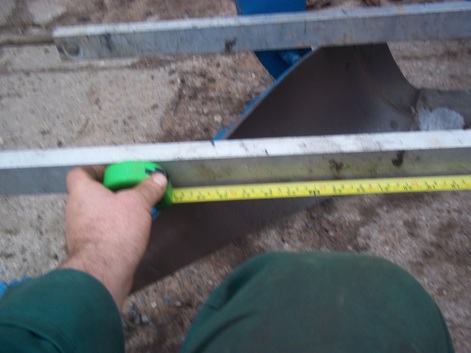
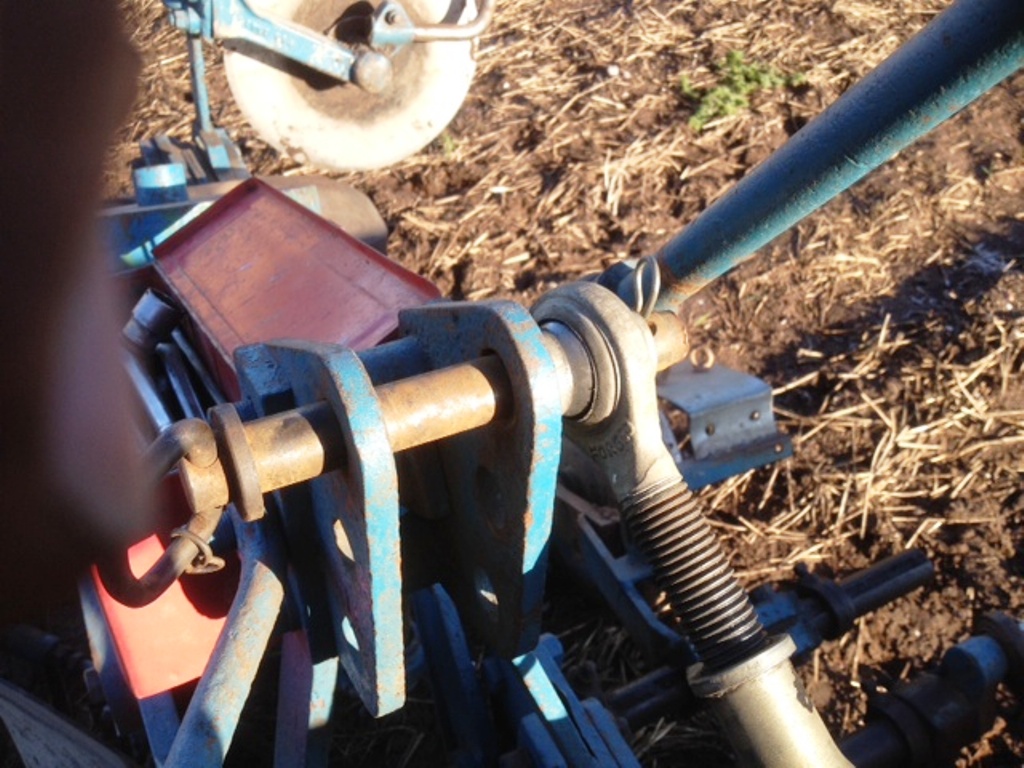
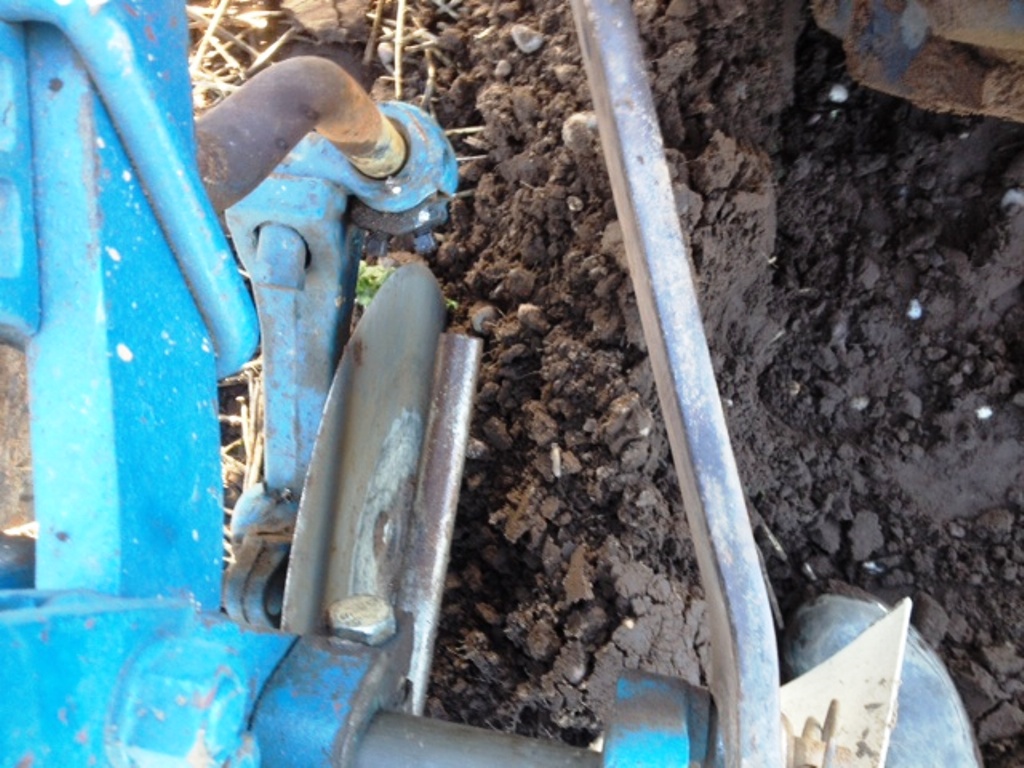
Measure point to point clearance,
Measure top of board to top of board near legs( pictured)
Measure point to point clearance,
Measure top of board to top of board near legs( pictured)
Amount of board push ?
Before setting the end of the mould boards parallel set the rear mould board to push the soil over by the required amount, this setting depends on furrow width, mould board type, personal preferences etc, but set it by measuring from the end of the land side, square across to the back of the mould board, adjust as necessary with the rear mould board stay.
Then adjust the front stay until the point to point measurement, the top of the mould boards by the legs, and the top of the mould board at the rear end are all the same.
The plough is now set square and parallel to turn equal furrows
Then adjust the front stay until the point to point measurement, the top of the mould boards by the legs, and the top of the mould board at the rear end are all the same.
The plough is now set square and parallel to turn equal furrows
Now check alignment of mould boards
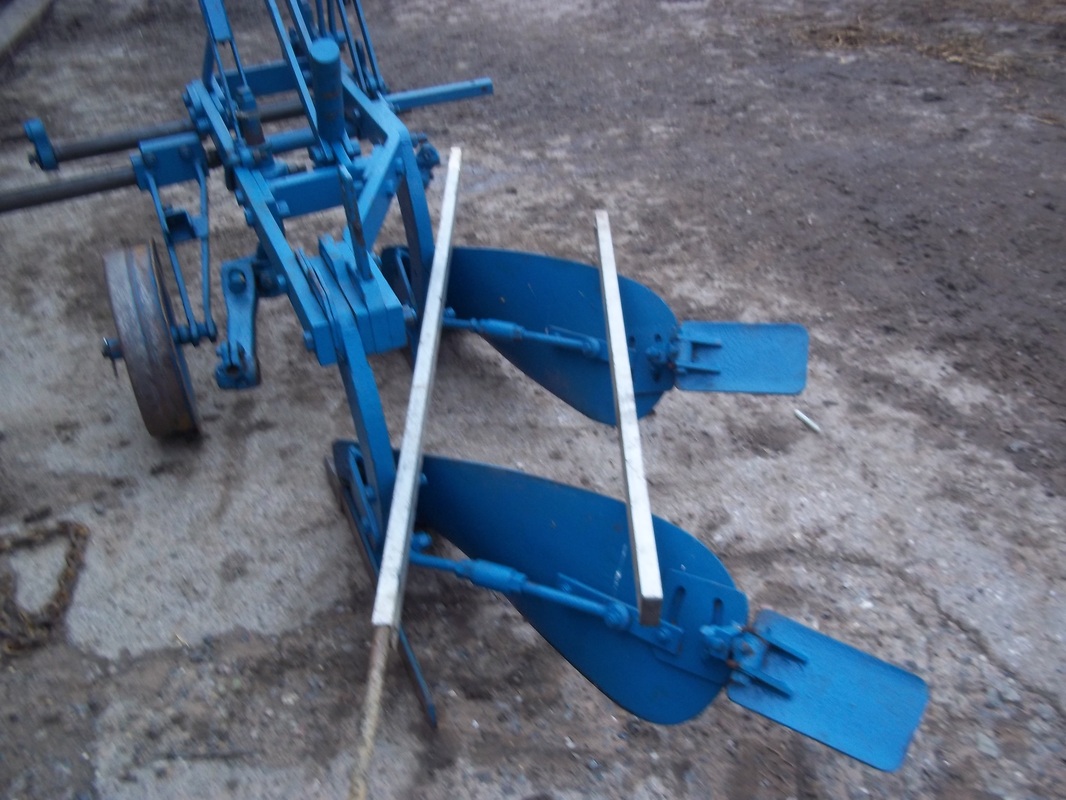
With mould boards set to parallel lay the straight edges, one against both legs and one on the chalk marks made on top of the mould boards
Then Eye it up !
Crouch or kneel down and line up the 2 straight edges , the photograph shows they are perfectly parallel and the plough must be straight and true,
If straight edges have unequal gaps on either side then the plough is not true
If plough is not straight it is important to try to ascertain which body is incorrect, generally my money is on the front furrow, if encountering a stoney patch in a field the front body is usually the one that gets the beating to remind the operator he needs to slow down through the bad patch, however with multi- furrow ploughs, the ability to get closer to hedges and trees can mean the rear furrow gets hooked up in the roots.
You may already have your suspicions about which furrow is incorrect, multi furrow ploughs are easy to detect as the bent one sticks out like a sore thumb but with 2 furrows only it is more difficult, firstly, go back to the land side parallel test, which furrow straight edge was running at an angle to the plough frame?
Then look at the last sight test which furrow was the mould board higher on, distortion is usually caused by the point hitting something solid therefore pushing the whole lot back and up.
Taking out small amounts of distortion is achieved by using packing, I usually start between the leg and the frog to square up the mould board tops and then correct the pitch with either the adjusters (if fitted) or by adding packing under the point.
Huge amounts of time can be spent removing distortion but will be very rewarding when the plough is squared up.
Large amounts of distortion can only be tackled with either new or recycled parts, if the problem is deemed to be in the frame rather than the legs or frogs it may be as well to strip the plough completely and start with a different frame and build the other parts to it
How to plough an opening
By popular request I am finally getting round to expanding this page, apologies to those who have been waiting patiently for this update.
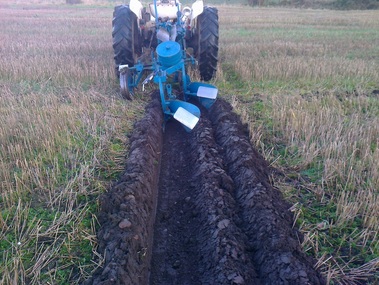
Assuming we all know how to set out the sighting poles we progress onto setting the plough for the first run of the opening.
Lower the rear disc, preferably a left hand disc if you are using Ransomes discs, to the bottom of the share, raise the front body out of work by lengthening the toplink a few turns and raising the right link arm with the leveling box, draw into the plot a couple feet and check the depth, if the plough has penetrated to the required 3 inches deep then wind down the depth wheel to take a little of the plough's weight, drive another couple of feet then recheck the depth and adjust if needed, being careful not to drive whilst looking rearward, as you progress across the field take care through tramlines and ruts, you may need to deepen the depth wheel or shorten the toplink through deep depressions in the field to ensure all the land is properly cut through.
For this 1st run some competitors use extra holes in the front leg to raise the front body and therefore allow them to keep the plough more level without the front share dragging the ground, if you do not have this facility you can also raise the front body by the following trick;
Remove the front bolt on the top of the rear leg (or front 2 bolts if it has 3 bolts holding leg on) and replace the bolt with one half the diameter, this will pitch the rear body in to the ground then lengthen the toplink to bring the pitch correct, this will then raise the front body well clear of the ground and allow you to run the plough more level on the leveling box...............remember to replace the correct size bolts at the end of the 1st run!!
For the return run reset the plough to near normal ploughing toplink length, lower the leveling box so that the plough is level and position the tractor so that the front left edge of the share runs exactly along the disc cut from the previous run and at the same depth as the previous run, raise the depth wheel to deepen the plough then the back furrow deepens the open furrow made on the 1st run by another 2-3 inches so that the total depth of the opening is near to the depth of the ploughing on the main of the plot, again, set the plough in and check after a few feet
Competitors tend to use the mark left by the depth wheel on the first run as a guide to drive the tractor to on the 2nd run of the opening, however it is possible to sight the chassis of the tractor down the disc cut if the depth wheel has struggled to make a mark due to hard dry ground, only experience with your own tractor and plough will give you the exact positioning of the tractor and subsequently the cut in the right place, practice makes perfect
Competitors tend to use the mark left by the depth wheel on the first run as a guide to drive the tractor to on the 2nd run of the opening, however it is possible to sight the chassis of the tractor down the disc cut if the depth wheel has struggled to make a mark due to hard dry ground, only experience with your own tractor and plough will give you the exact positioning of the tractor and subsequently the cut in the right place, practice makes perfect
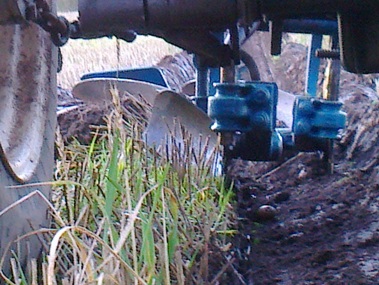
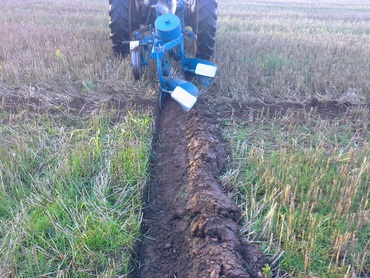
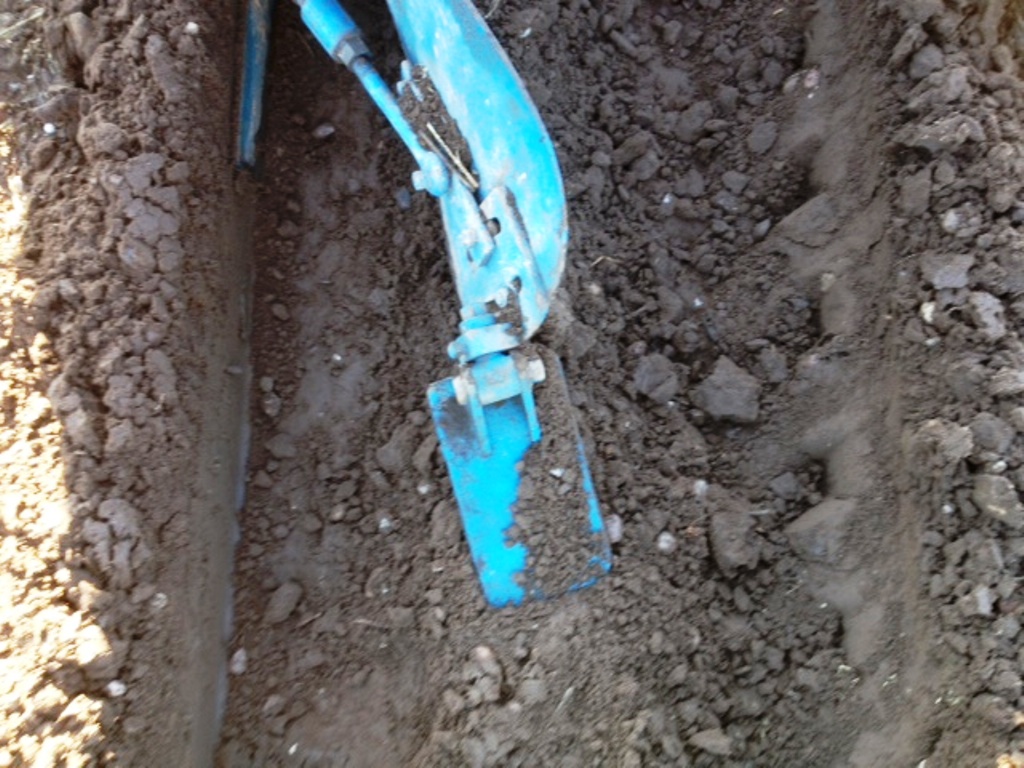
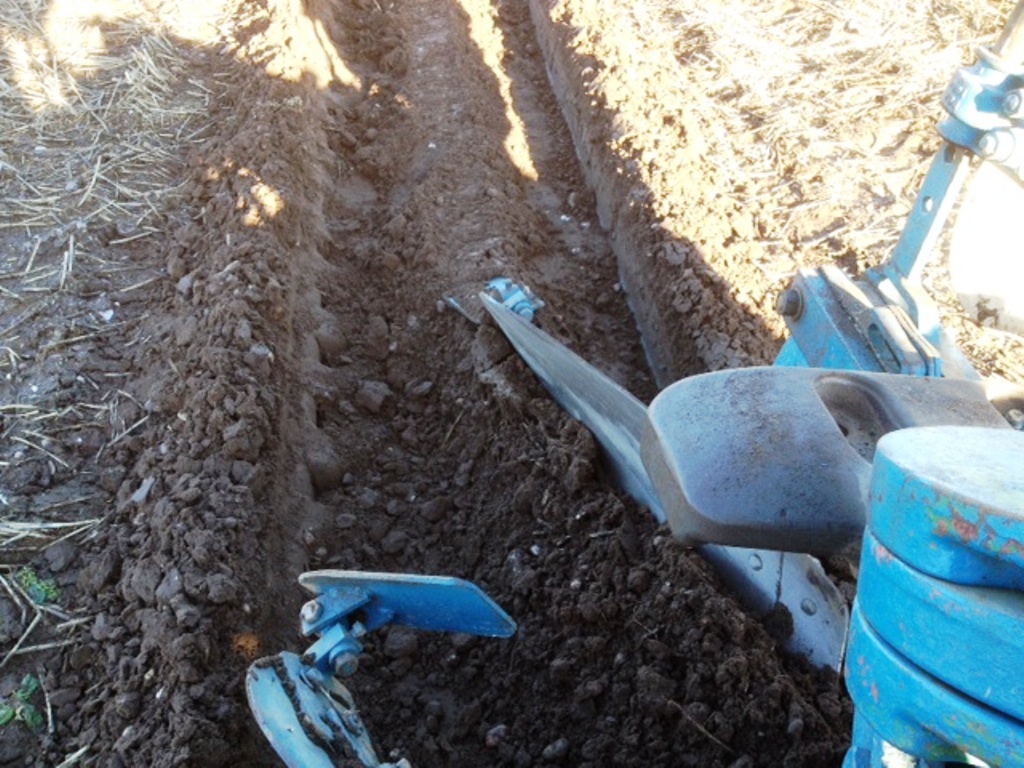
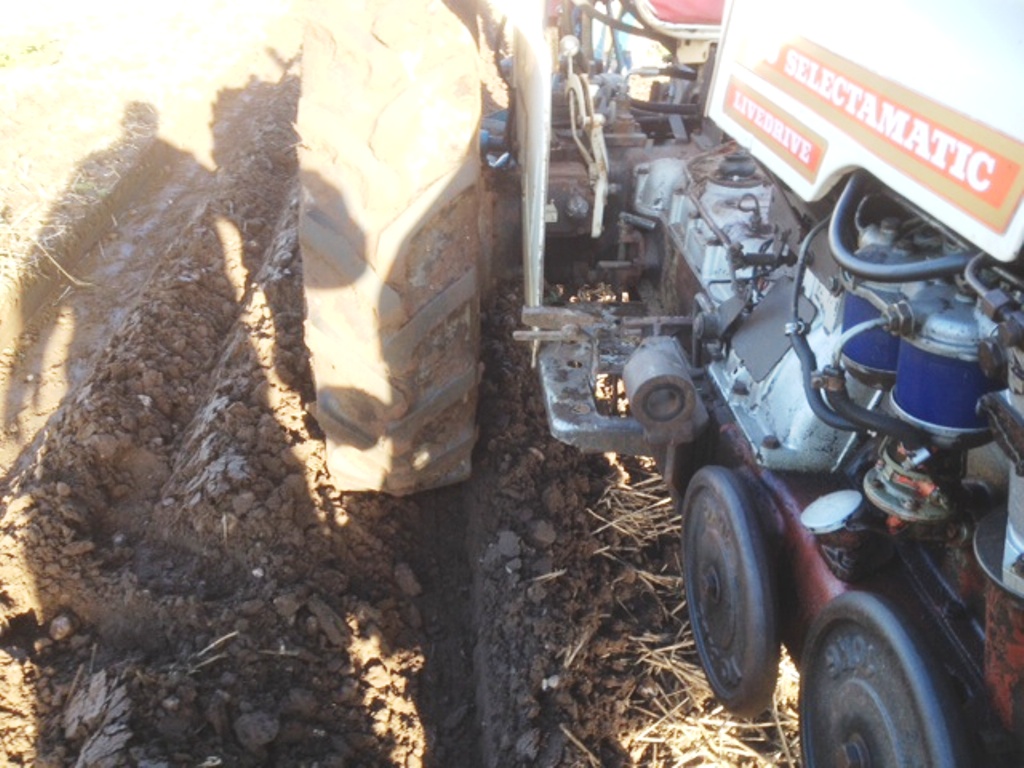
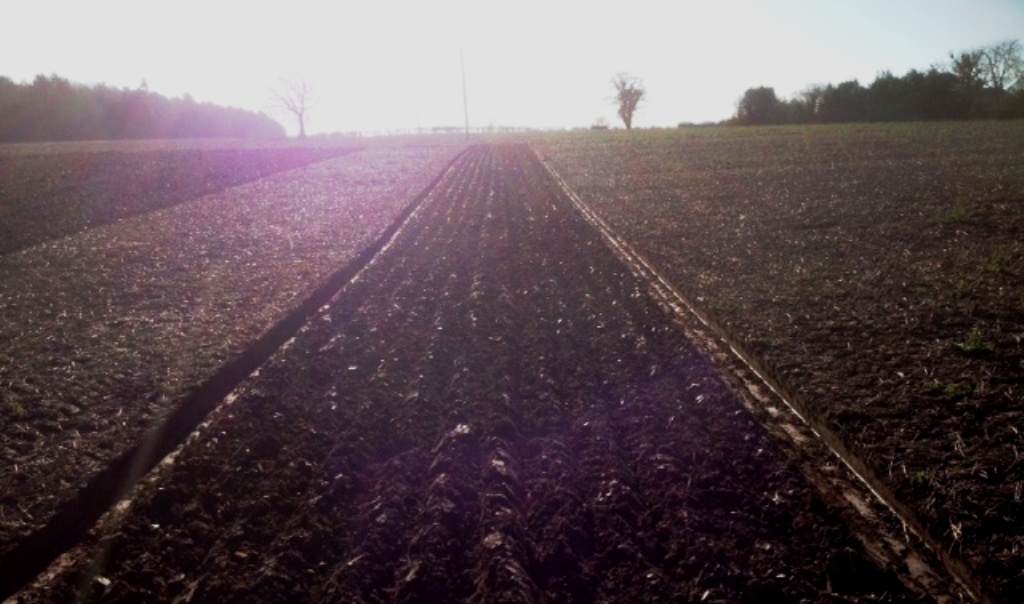
This photo shows the correct positioning of the plough on the 2nd run of the opening,
the front share is taking all the stubble leaving only soil for the rear share to cut, looking from this direction if the plough and tractor positioning was further left a strip of stubble would be evident in the back furrow and a step between the 1st run and the 2nd run would be visible due to the rear furrow not cutting near enough to the 1st run, points would be lost, further right and the plough would be cutting away at the 1st run of the opening and again stubble would be evident in the rear furrow, the 1st run would be made to look too small due to cutting it away with the rear body on the 2nd run
the front share is taking all the stubble leaving only soil for the rear share to cut, looking from this direction if the plough and tractor positioning was further left a strip of stubble would be evident in the back furrow and a step between the 1st run and the 2nd run would be visible due to the rear furrow not cutting near enough to the 1st run, points would be lost, further right and the plough would be cutting away at the 1st run of the opening and again stubble would be evident in the rear furrow, the 1st run would be made to look too small due to cutting it away with the rear body on the 2nd run
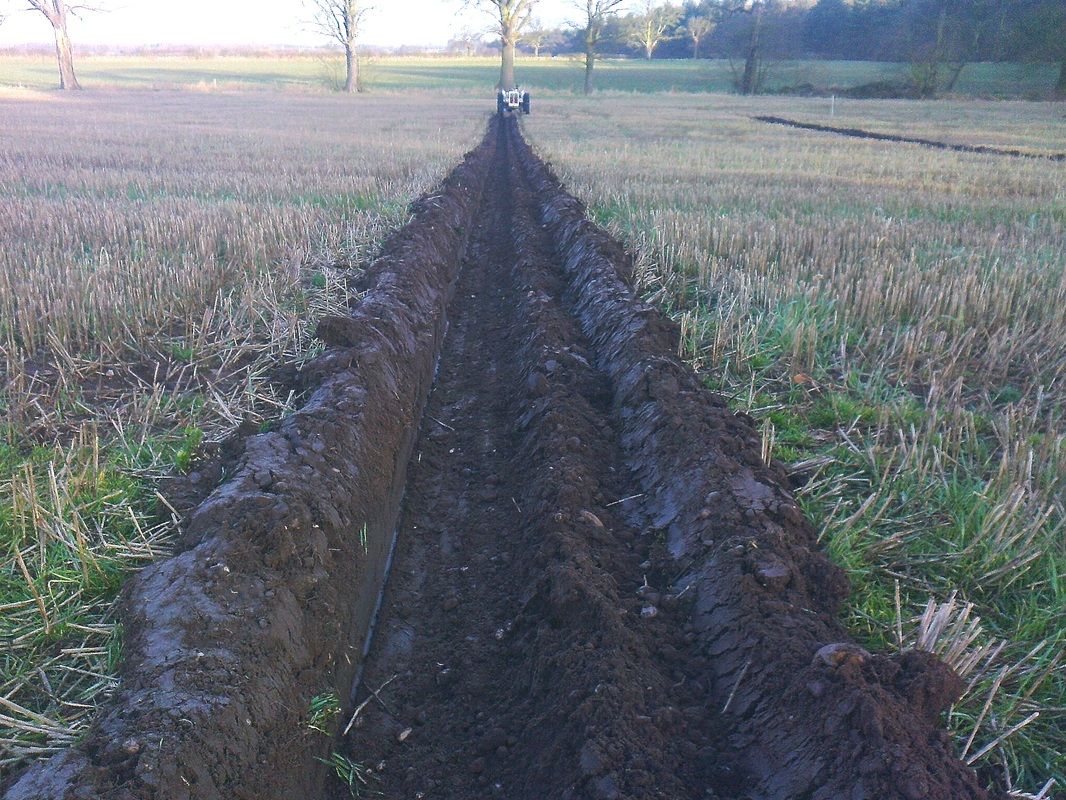
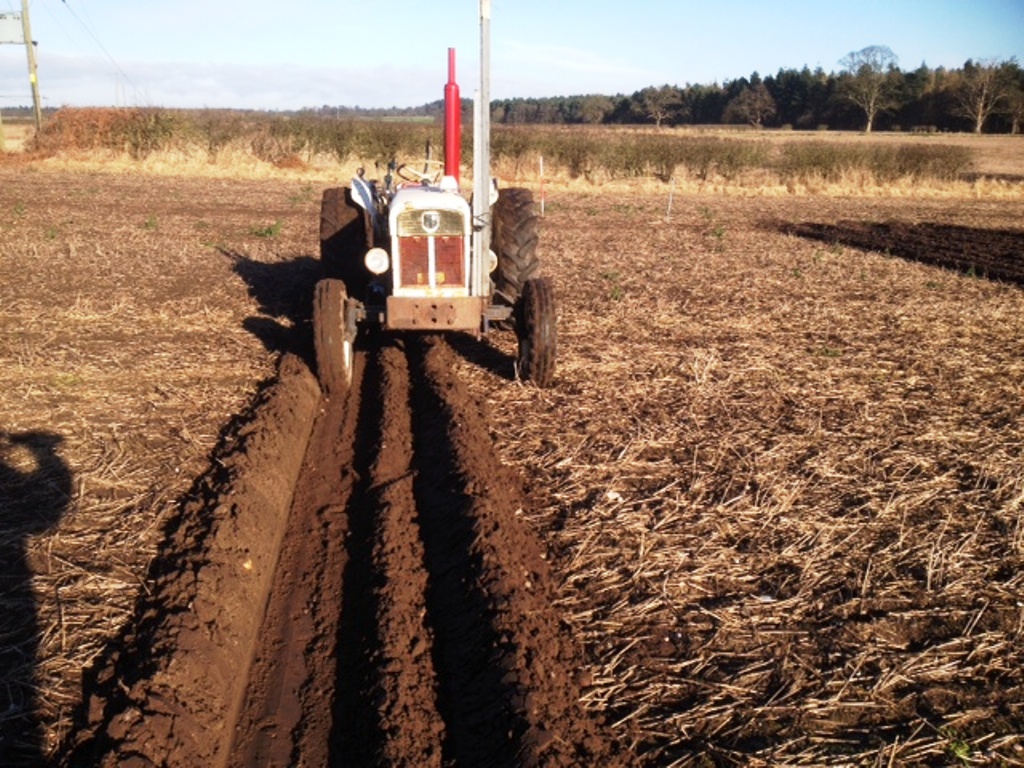
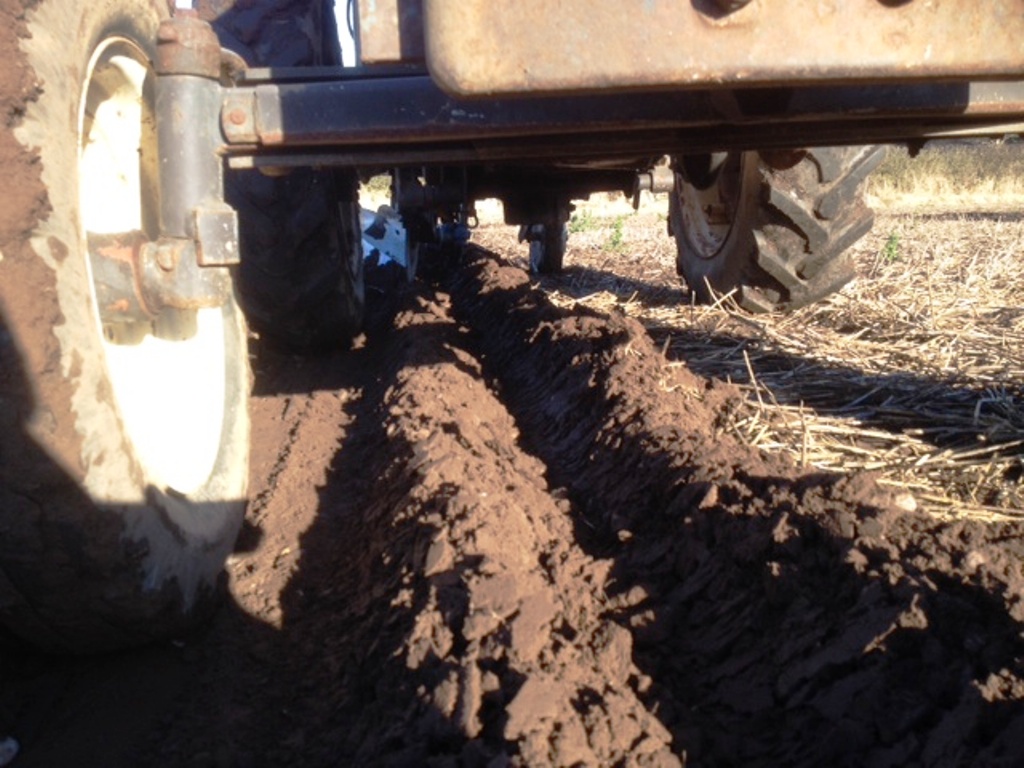
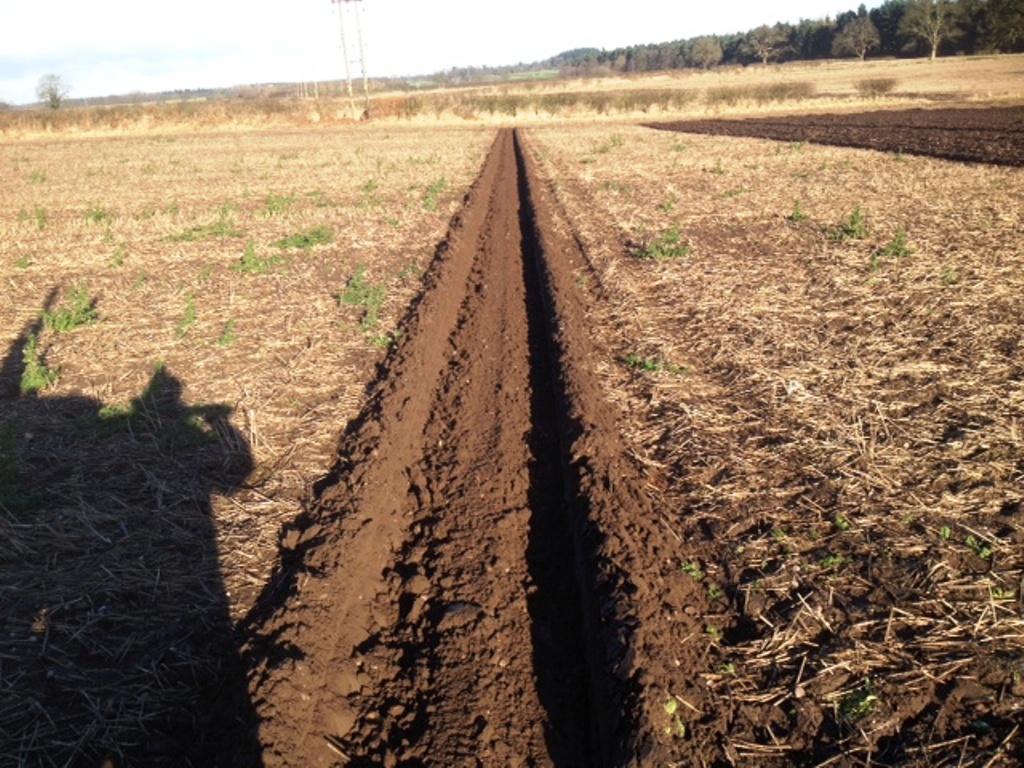
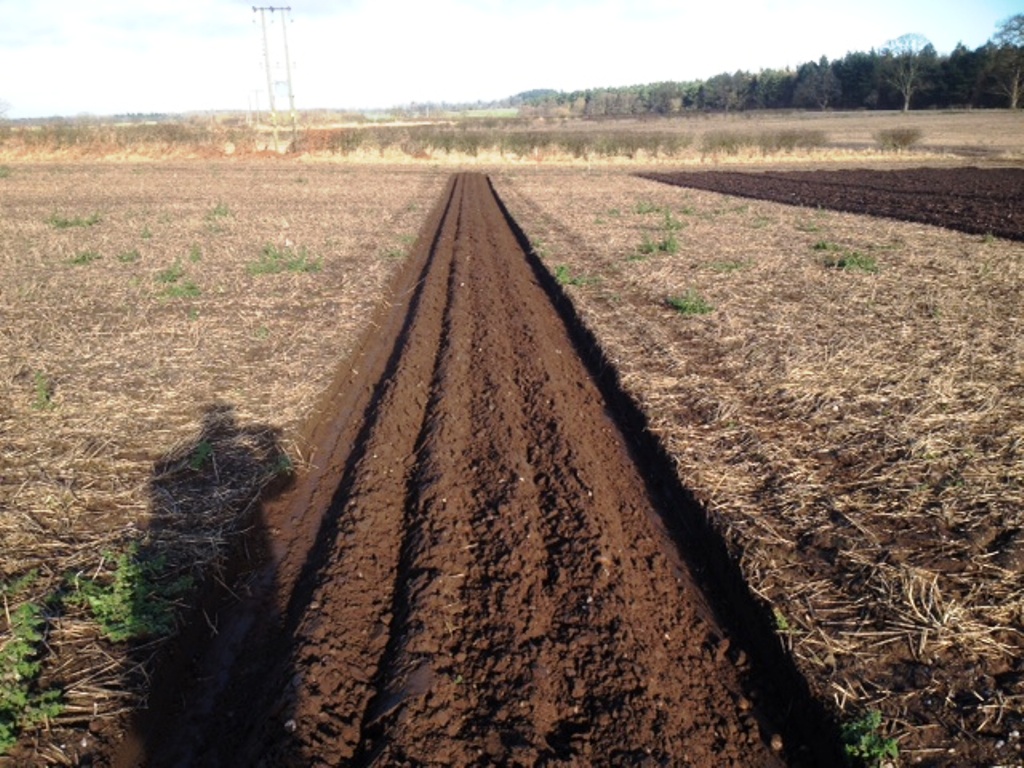
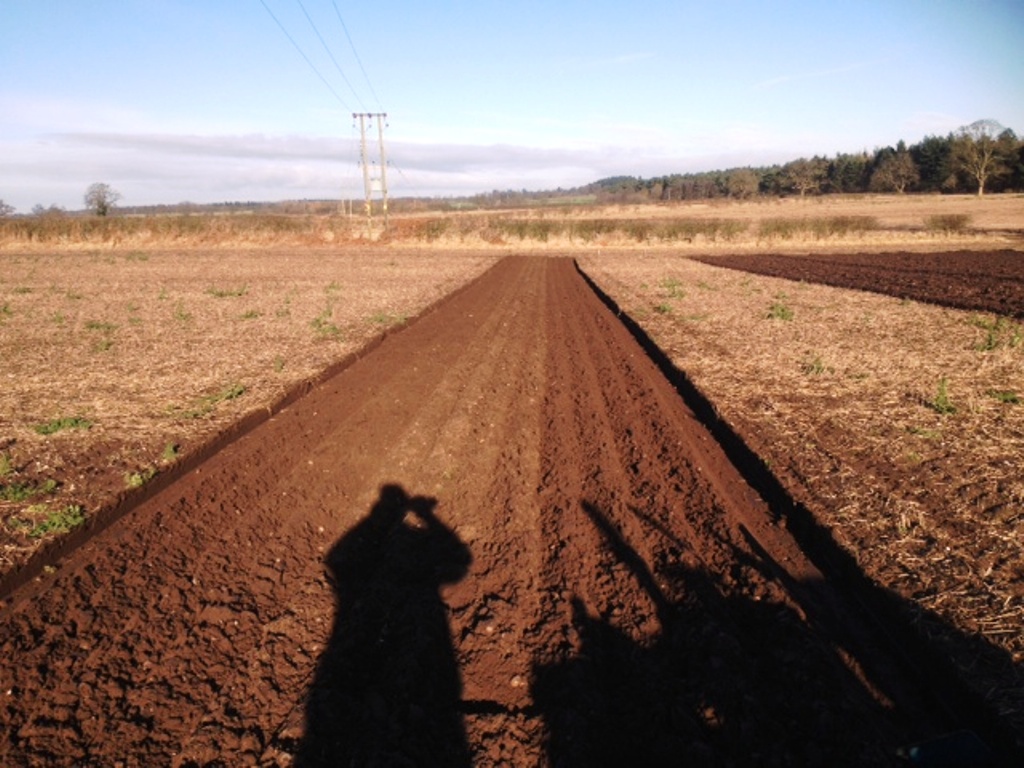
Below is what we are aiming for, it is not the perfect opening but has 2 equal furrows on either side and a middle furrow containing clean earth only, it is well cut and deep enough so that when the start is laid into it all the soil will have been moved and no hard ground is left to deter the following crop from rooting correctly.
In the next installment we will look at ploughing in the start
In the next installment we will look at ploughing in the start
The Start
Having ploughed the opening, whilst waiting for the judges to mark each opening adjustments in readiness for the start are made, there are 3 ways in which to make the start, rig, crown or cop, for this article I will concentrate on the most popular version where the opening is chipped in with the rear furrow before folding in 4 furrows on top of the opening.
1st, move the plough completely over on the cross shaft to the right ( as viewed from the rear)
1st, move the plough completely over on the cross shaft to the right ( as viewed from the rear)
Then wind the leveling box right up to the top of it's adjustment, this has the effect of levering the plough even more to the right hand side, leave the left hand disc in the same position as for the opening, move the toplink (if possible) to the left of the headstock to stop it binding/running on an adverse angle for the run
In vintage ploughing classes only a standard flat tail piece is allowed, however in classic classes the use of an adjustable tail is allowed, use this to flatten the chip
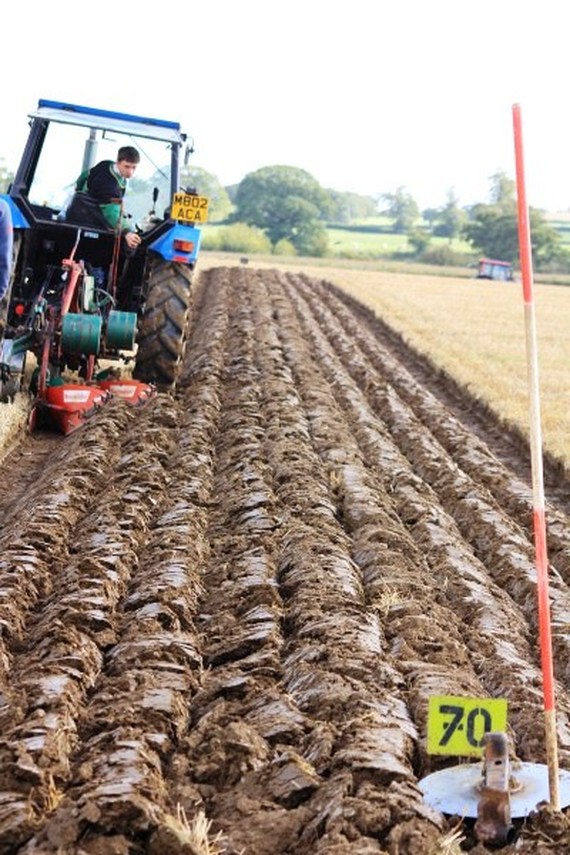
Position the tractor in the furrow bottom of the opening and plough a chip over with the rear furrow into the middle of the opening, my aim for this furrow is to have an equal depth on either side of the chipped soil in the middle, many competitors ask me what width to make the distance between the 2 sides of the chipped opening, this distance is important but is almost unique to each different ploughmans preferred set up.
The width depends on the amount of push applied to the boards, more pushed out mould boards require a wider chip, and to a lesser extent the soil texture, sandy soils tend to crumble and break off so a narrower chip in sand can help to fill the middle of the start better
Positioning of the tractor
The width depends on the amount of push applied to the boards, more pushed out mould boards require a wider chip, and to a lesser extent the soil texture, sandy soils tend to crumble and break off so a narrower chip in sand can help to fill the middle of the start better
Positioning of the tractor
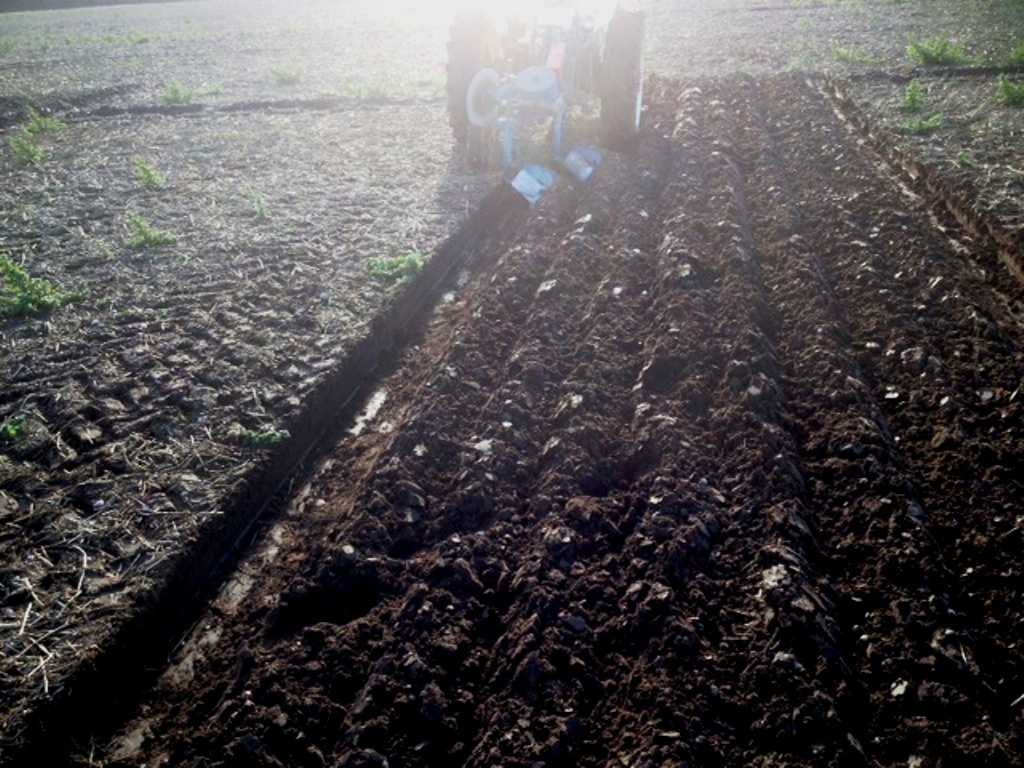
The chip as viewed from the tractor seat
The completed chip ready to have the start laid on top of it
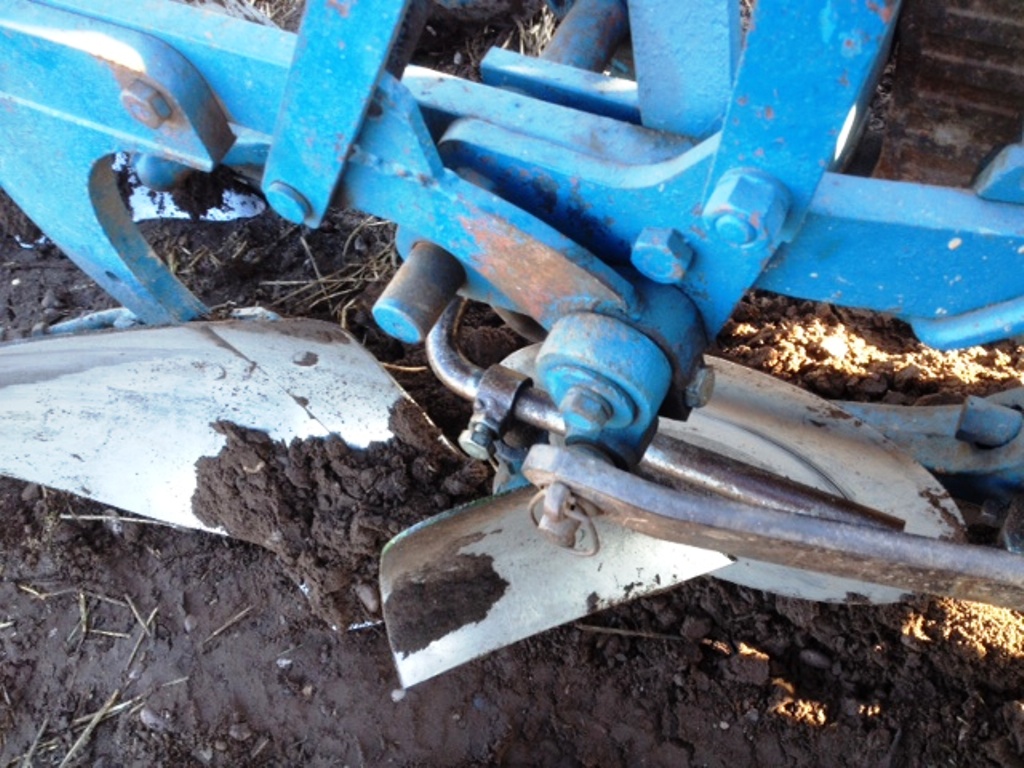
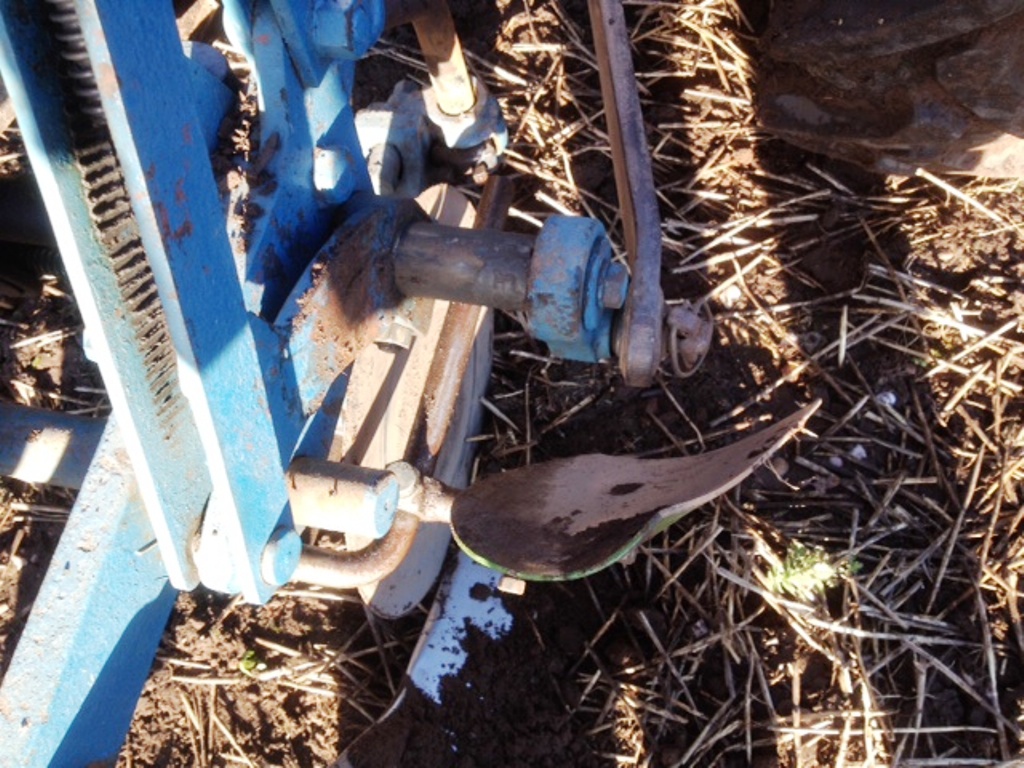
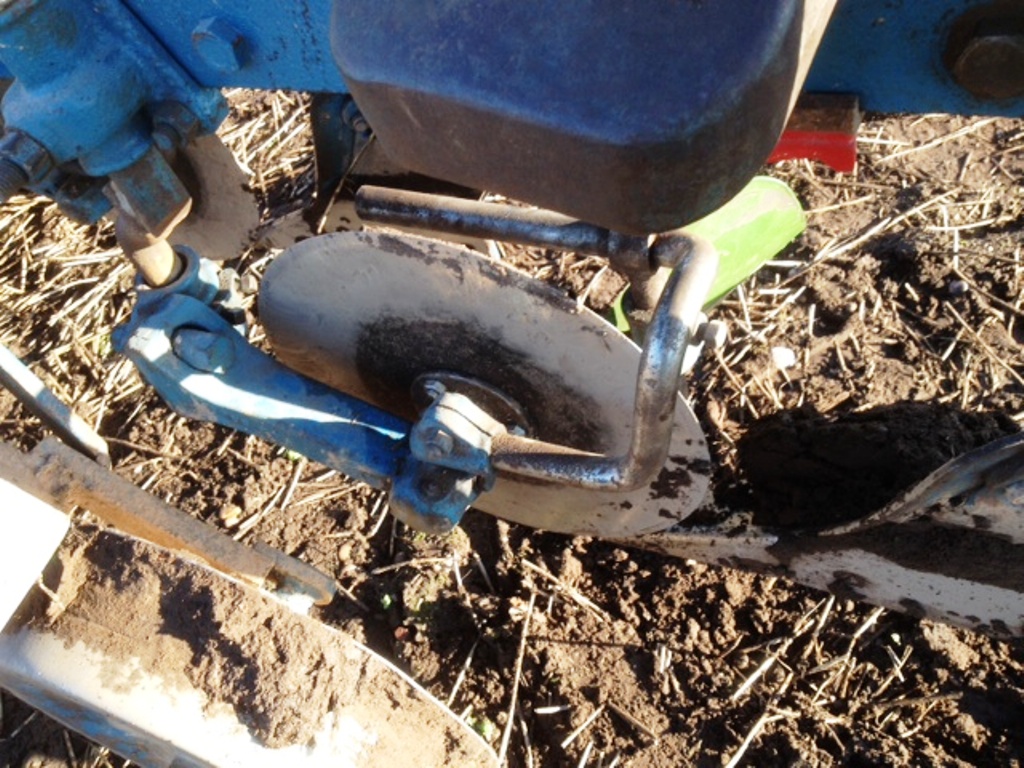
Now move the cross shaft back to the normal ploughing position, lower the front disc right down the side of the share and move the skimmer out of the way as per photo below
Replace the left hand disc with the right hand one and set it to cut about half an inch wider than normal, this is to try and make the rear furrow on the first time round look bigger, this furrow can look small in the start due to being ploughed with the plough tilted up on the levelling box to keep the front furrow low
Position the tractor in the trench made by the opening and the plough so that the front disc cuts up the side of the turned out furrow of the opening,
above on this page I have made comment about getting the opening cut to exactly the right width, if your opening is correct then the start should also be the right width, and importantly, clean due to being cut by the front disc in the right place, slicing through the stubble so that it turns in rather than sticking up, taking the skimmer out of the way prevents the turned out furrow of the opening being disturbed and " heaped up", there should be no stubble to skim there anyway.
Make adjustments to the leveling box and top link to keep the front furrow low and to the depth wheel to keep the rear furrow no more than 2/3rds of the minimum depth

When this run is completed, turn back up the plot and turn 2 similar furrows to the other side of the start, when ploughing the chip I commented on making both sides of the trenches equal depth, if you have managed this you should, theoretically, have no need to make any adjustment to create a matching, level start, however, in practice small adjustments will need to be made on the leveling box, toplink and width handle to get the 2 middle furrows matching
Once the first 4 furrows have been completed you need to return the front skimmer to work, raise the front disc and reset the rear disc width to normal ploughing settings and set the plough deeper for the next run, I find with my setup that the depth wheel needs no adjustment as the tractor will now have it's right wheel in a deeper furrow and the plough gains depth without adjustment.
the front furrow on the next 2 runs will match the previous run better if ploughed a little wider(1/2inch) and a touch deeper than normal, matching this bout is probably just as difficult as ploughing the centre of the start, it is very important to remember that the start consists of 12 furrows and they all need to match each other, you can have the most perfect rig in the centre of the start but if the following furrows don't match points will be lost
the front furrow on the next 2 runs will match the previous run better if ploughed a little wider(1/2inch) and a touch deeper than normal, matching this bout is probably just as difficult as ploughing the centre of the start, it is very important to remember that the start consists of 12 furrows and they all need to match each other, you can have the most perfect rig in the centre of the start but if the following furrows don't match points will be lost
When the final 2 furrows are added to either side of the start the plough settings will be at or very near to the normal ploughing settings, the depth will be at the minimum depth for your class ( vintage 15cm, classic 17cm, world style 20 cm) or slightly deeper, avoid ploughing too deep as this tends to leave rough furrows that stand up on end and in extreme conditions on heavy soil can fall back in.
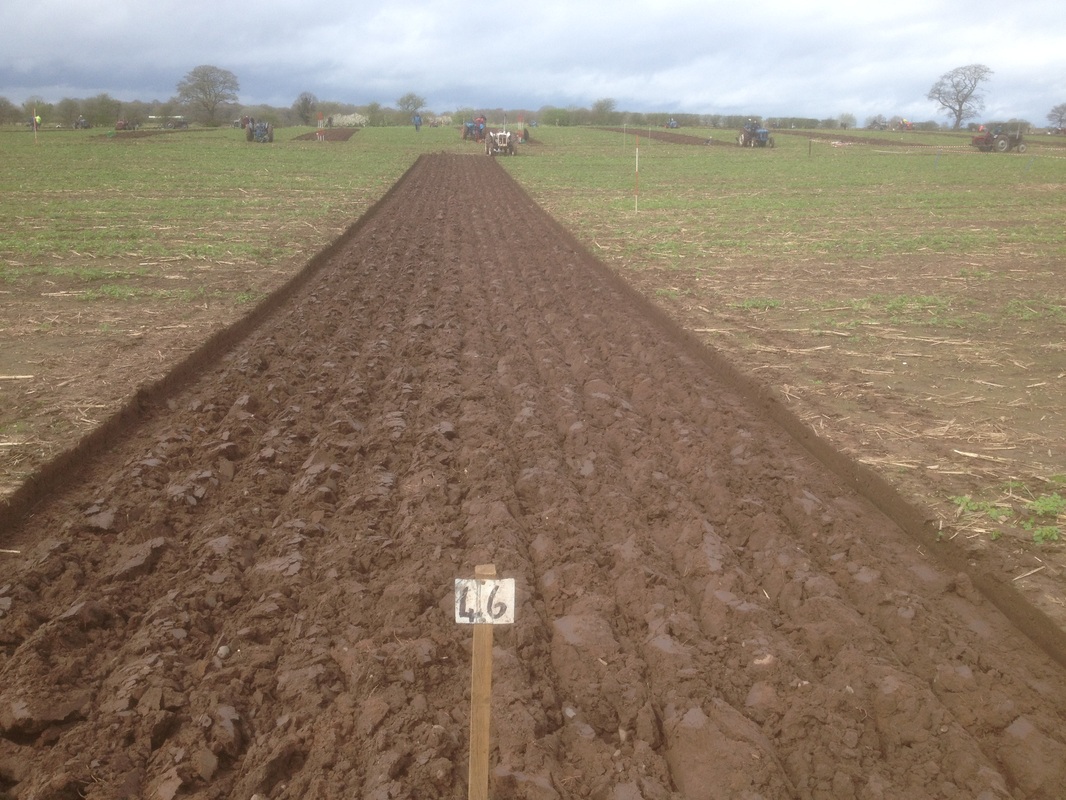
A couple of very nice starts seen at local ploughing matches
Stuart Vickers from Whitchurch, Shropshire borders ploughs a superb start
Stuart Vickers from Whitchurch, Shropshire borders ploughs a superb start
A very even crown in the classic class at Whitchurch YFC match spring 2014
The winner of the classic class at Cruckton's 80th anniversary match, year 2012